

Table of Contents
- Why Controller Sticks Drift: The Real Causes
- How to Fix Drifting Controller Sticks Without Opening It
- Step-by-Step: Opening and Cleaning Drifting Controller Sticks
- Best Tools for Controller Repair
- How Long Does Controller Repair Take?
- Preventing Stick Drift on Gaming Controllers
- When to Get Professional Help in Greenville, SC
- Frequently Asked Questions
Last Updated: September 23, 2026
Why Controller Sticks Drift: The Real Causes
Stick drift happens when your controller sends movement signals even when you are not touching the stick. FixPhone sees this problem often at our Greenville, SC shop, and the cause is almost always physical wear or debris inside the joystick module.
The good news: many cases are fixable at home. Below, we break down every method for how to fix drifting controller sticks, from free software fixes to a full teardown. We also cover when a pro repair makes more sense than a DIY attempt.
Worn Potentiometers and Dust Buildup
A potentiometer is a small variable resistor inside the joystick module that translates stick position into electrical signals. Two of them track your X and Y movement.
Over time, two things go wrong:
- The carbon track inside the potentiometer wears down from friction
- Dust, skin oils, and grit settle on the contact surface
Both problems corrupt the signal. The controller reports “stick pushed left” when the stick is centered. That is drift.
Drift is a mechanical problem, not a software bug. This matters because it tells you which fixes will actually work.
Do not fix drift by blowing compressed air into the stick gap. It pushes debris deeper into the potentiometer and can make drift worse within days.
How to Fix Drifting Controller Sticks Without Opening It
Try software fixes first. They cost nothing and take under 15 minutes. If drift started after a firmware update or only affects one game, software is likely the culprit.
Calibration and Firmware Updates
Controller calibration is the process of resetting the controller’s neutral point so it correctly recognizes when the stick is at rest. Most consoles have a built-in tool for this.
Here is how to run it on each platform:
- Nintendo Switch: System Settings > Controllers and Sensors > Calibrate Control Sticks
- PlayStation 5: Settings > Accessories > Controllers > Calibrate Stick
- Xbox: Use the Xbox Accessories app on console or PC
- PC gamepads: Check the manufacturer’s companion software for a calibration option
Then update your controller firmware. Console makers ship stick-deadzone fixes through updates.
If calibration does not hold, the hardware is worn. Move to the next section.
Step-by-Step: Opening and Cleaning Drifting Controller Sticks
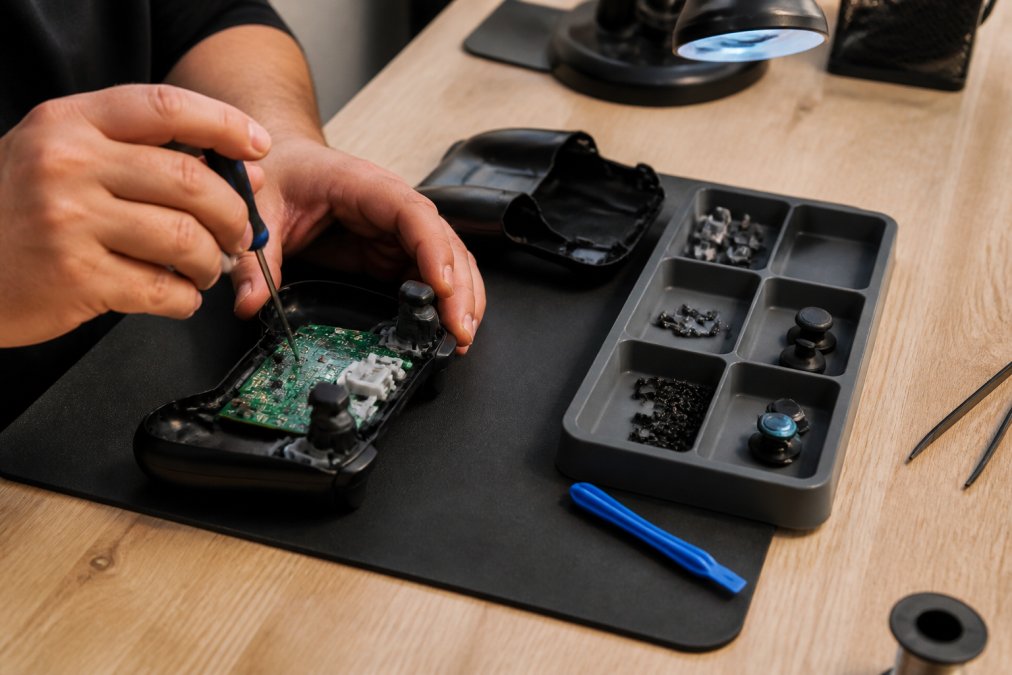
A teardown and cleaning fixes most drift cases caused by dust or mild wear. Set aside 30 to 45 minutes and work on a clean, well-lit surface.
Tools You’ll Need
Gather these before you start:
- A precision screwdriver set (Phillips #00 and a tri-point driver for Nintendo)
- Plastic pry tools or a guitar pick
- Isopropyl alcohol (90% or higher) and cotton swabs
- A can of electrical contact cleaner
- A small tray for screws
Follow these steps:
- Power off the controller and remove the battery or unplug it.
- Remove the back screws and keep them in your tray.
- Pry the shell apart gently along the seam.
- Lift out the joystick module and locate the potentiometer openings.
- Spray a short burst of contact cleaner into each opening.
- Rotate the stick in full circles for 30 seconds to work the cleaner in.
- Wipe the carbon tracks with a swab dipped in isopropyl alcohol.
- Let everything dry for 10 minutes, then reassemble.
Expected result: The stick should return to center with no ghost input. Test it in your console’s calibration screen before closing the shell.
Mark each screw’s location on a paper diagram as you remove it. Controllers use different screw lengths, and a long screw in a short hole can crack the shell.
If drift returns within a week, the carbon track is worn past cleaning. That is when you replace the joystick module or hand it to a pro.
Best Tools for Controller Repair
The right tools for controller repair make the difference between a fix that lasts and a broken shell. You do not need a full electronics lab.
| Tool | What It Does | Best For |
|---|---|---|
| Precision screwdriver set | Opens controller shells | Every repair |
| Electrical contact cleaner | Flushes dust from potentiometers | Cleaning drift |
| Isopropyl alcohol (90%+) | Cleans carbon tracks | Deep cleaning |
| Plastic pry tools | Splits shells without scratches | Safe opening |
| Replacement joystick module | Swaps the worn part | Severe drift |
| Soldering iron | Attaches new module | Module replacement |
A replacement module costs little, but it needs soldering on most controllers. If you have never soldered, practice on a dead board first.
How Long Does Controller Repair Take?
Most controller repair takes 30 minutes to an hour for a cleaning, and one to two hours if you replace the joystick module. A professional shop can often finish faster because techs have the tools staged and ready.
At FixPhone, many repairs are done in 45 minutes or less. That matters if you need the controller back for a tournament or a work call.
Timeline by repair type:
- Calibration only: 10 to 15 minutes
- Cleaning: 30 to 45 minutes
- Module replacement: 1 to 2 hours
- Full professional service: Often same day
Preventing Stick Drift on Gaming Controllers
Preventing stick drift on gaming controllers comes down to reducing wear and keeping debris out. Small habits add months of life.
Do these things:
- Wash and dry your hands before gaming sessions
- Store controllers in a case or drawer, not loose on a shelf
- Avoid eating while playing; crumbs are a top cause of drift
- Set a slightly larger deadzone in game settings to reduce strain
- Rotate between two controllers to spread the wear
What most guides miss is that pressing the stick down hard during play speeds up wear on the module. Ease up on the click.
Drift is a wear problem. The best prevention is less friction and less debris, not a special gadget.
When to Get Professional Help in Greenville, SC
Some drift cases need a pro. If cleaning did not fix it, the module is worn and needs replacement. That job needs soldering and a steady hand.
Look for professional help when:
- Drift returns within days of cleaning
- The stick feels loose or grinds when you move it
- You see physical damage to the module
- You do not own soldering tools
- The controller is under warranty
For anyone searching for controller repair near me in the Greenville area, FixPhone offers free diagnostics with no hidden fees. Our certified technicians use OEM or premium parts and back every repair with a 60-day warranty. We also handle game consoles, laptops, tablets, and phones, so a drifting Switch joystick and a cracked work laptop can be handled in one visit.
Frequently Asked Questions
What causes controller stick drift?
Stick drift happens when the analog stick’s internal components wear down or debris blocks the sensors. Common causes include dust, dirt, and worn potentiometers from heavy use. Controllers with Hall Effect sensors are less prone to drift because they use magnets instead of physical contact. For most standard controllers, drift is a mechanical issue that worsens over time.
Can you fix stick drift without opening the controller?
Sometimes. Try recalibrating the controller through your console settings or updating its firmware. Compressed air around the stick base can dislodge dust. If those fail, opening the controller and cleaning the potentiometers with isopropyl alcohol is the next step. Persistent drift usually means the sensor needs replacement, which requires soldering.
How long does controller repair take?
A basic cleaning and calibration can take some time. If you bring your controller to a repair shop like FixPhone in Greenville, same-day service is often available.
Is it cheaper to repair stick drift or buy a new controller?
Repairing is often a cost-effective alternative to buying a new controller and can extend the life of your existing controller. If the controller has other issues like broken buttons or a damaged shell, replacement might make more sense.
Drifting sticks are frustrating, but they rarely mean you need a new controller. Try calibration, then a cleaning, and let a pro handle module replacement if drift comes back. FixPhone handles controller and console repairs in Greenville with fast turnarounds, free diagnostics, and a 60-day warranty on every job. Get started with FixPhone and get your controller back in the game the same day.